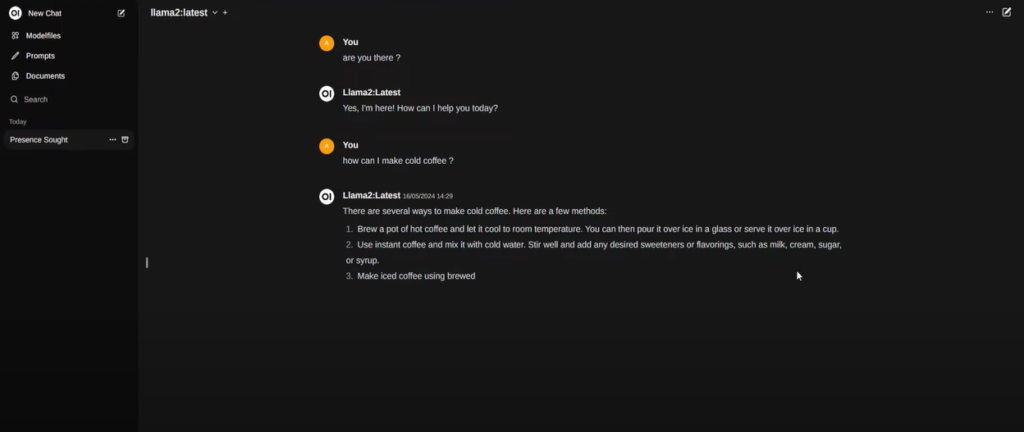
In this guide, I will show you how to host your own AI assistant locally on your PC. You won’t need an internet connection to use it, and you can run it whenever you want. You can use this AI assistant just like ChatGPT, but with enhanced privacy, as it runs entirely on your PC.
Table of Content
Why Host Your Own AI Assistant?
- No Internet Required: You can use it offline.
- Privacy: No data is sent to external servers.
- Control: You have complete control over the assistant.
Getting Started
Step 1: Launching the Terminal
First, open the terminal on your PC. To do this, search for “Terminal” in your PC’s search bar and launch it.
Step 2: Entering Commands
In the terminal, enter the following command to install WSL (Windows Subsystem for Linux):
wsl --installAfter executing this command, it will prompt you to restart your PC. Please do it, before continuing further.
After restarting, enter the username for the UNIX user account.
If you encounter an error, try entering your username in lowercase letters and setting a new password when prompted.

Step 3: Updating and Upgrading
Next, run the following commands to update and upgrade your system one by one:
sudo apt update
sudo apt upgrade
You may need to enter your password again.
Step 4: Installing Additional Software
Visit ollama.com, then select the Linux option and copy the command.

After copying the command, go back to the terminal and paste the command that you copied.
Wait for Ollama to download. The download speed will depend on the internet connection so give it some time.
Step 5: Running the AI Model
Open your browser and type:
localhost:11434You should see a message saying “Ollama is running,” indicating that everything is set up correctly.
To download a language model, go back to the terminal and use the command:
ollama pull llama2Once downloaded, run the model if you want to chat with it inside the terminal:
ollama run llama2To end the chat, type /bye
Step 6: Interacting with the AI
If you want to interact with AI assistant inside your browser just like ChatGPT. Open a fresh new terminal by typing
wsl -d ubuntuThen paste the following command:
# Add Docker's official GPG key:
sudo apt-get update
sudo apt-get install ca-certificates curl
sudo install -m 0755 -d /etc/apt/keyrings
sudo curl -fsSL https://download.docker.com/linux/ubuntu/gpg -o /etc/apt/keyrings/docker.asc
sudo chmod a+r /etc/apt/keyrings/docker.asc
After entering this command, it will prompt you to enter the password. After that paste the second command:
# Add the repository to Apt sources:
echo \
"deb [arch=$(dpkg --print-architecture) signed-by=/etc/apt/keyrings/docker.asc] https://download.docker.com/linux/ubuntu \
$(. /etc/os-release && echo "$VERSION_CODENAME") stable" | \
sudo tee /etc/apt/sources.list.d/docker.list > /dev/null
sudo apt-get update
Wait for it to process then enter the third command:
#Install Docker
sudo apt-get install docker-ce docker-ce-cli containerd.io docker-buildx-plugin docker-compose-plugin
Now enter the following command:
sudo docker run -d --network=host -v open-webui:/app/backend/data -e OLLAMA_BASE_URL=http://127.0.0.1:11434 --name open-webui --restart always ghcr.io/open-webui/open-webui:mainStep 7: Running the AI Assistant
After doing all of the steps, open your browser and go to:
localhost:8080It will prompt you create your account, if you already have one then login into that account in order to access the AI Assistant.
After that, our own AI chat board will be launched with all previous chats and history intact (if any).

Conclusion
By following these steps, you can host your own AI assistant locally on your PC. This setup ensures privacy and control over your interactions with the AI.
